Pennyrile Technologies

Speed-Up-Windows-10-Part-Two

Speed Up Your PC With These 4 Tips

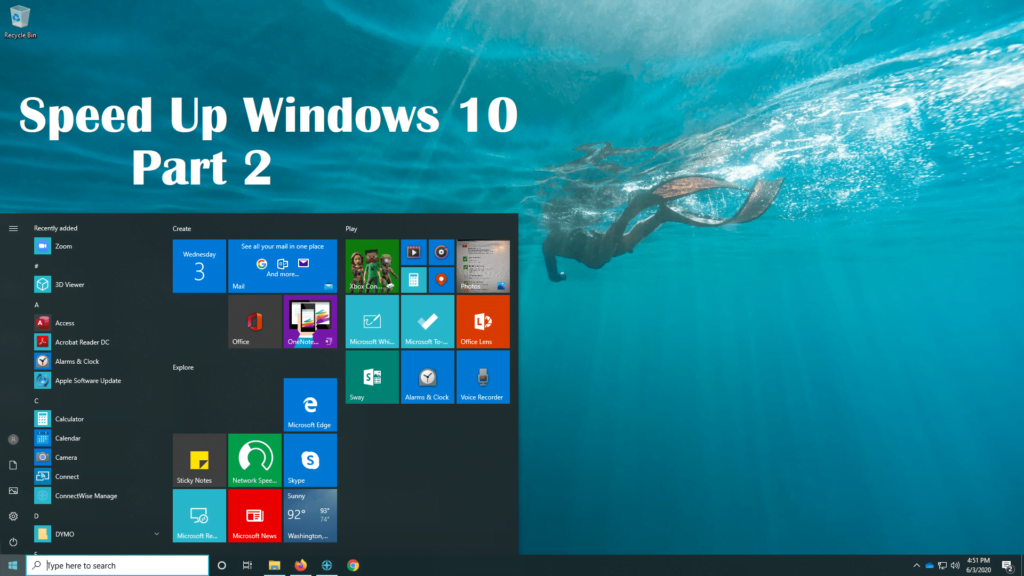
You probably don’t need us to tell you that there are a lot of things that can slow down your PC. If you’re looking to improve the overall speed of your machine, we’re here to continue some useful tips to help you along. Earlier, I began a series of quick tips to speeding up your computer.  In that article, we covered Computer Settings, Startup Programs, Disk Cleanup, and Adware & Bloatware removal. This time we are going to continue with a few more tips on increasing the performance of your computer. For those who did not read the first article but would like to, check out 4 Quick Tips To Speed Up Your PC. Defragment Your Hard Drive Lets talk about organization. Your hard drive must organize the data that is put on it.  With more data comes more responsibility.  So, to help your hard drive stay organized it is recommended that you defragment your hard drive regularly. Defragmentation involves moving all of the files on your hard disk so that the operating system can read them more quickly and efficiently. Usually this is done automatically by your operating system but sometimes it can be missed. (Note:  If you have a SSD then it is not recommended to Defragment your Drive because it could shorten its’ life.) To Defragment your hard drive 1:  Go to the Start menu. 2:  Scroll down to Windows Administrative Tools and click. 3:  Select and Click Defragment and Optimize Drives. 4:  Select the drive you would like to Defragment and Click Optimize. 5:  Wait for Defrag to complete its work. Adjust PC Power Settings After defragmenting, your computer might still be slow. This is a good opportunity to change your power settings. There are 3 types of default power settings:  Power Saver, Balanced, and High-Performance. Having your computer set to Power Saver saves on power usage but at the cost of performance, which can slow down your computer. The Balanced setting is the in between for the other two settings.  Lastly, the High-Performance setting uses more power to get the best performance. The later of the settings will eat up the power of your battery provided you are using a Laptop. To change your Power settings 1:  Go to the Start Menu 2:  Click on Windows System and Select Control Panel. 3:  In Control Panel Click on System and Security 4:  Click on Power Options. 5:  Select the High-Performance. (Note:  If you have Control Panel set to Large or Small Icons then click on Power Settings.) Turn Off File Indexing Now that you have set your power settings to your liking, lets move on to Indexing.  Indexing allows you to use the Windows 10 search function more efficiently.  It does this by indexing the files on your drives. The Indexing Service uses CPU and RAM to search for a file that you want to find.  This can slow down a computer that is already taxed on CPU and RAM usage. By turning file indexing off, it can help speed up your PC. To shut down the Windows Indexing Service 1:  Go to the Start Menu and scroll to Windows Administrative tools and click, then select and click Services. 2:  When the Services Window opens, scroll down to “Windows Search” and Right click on it and select Properties. 3:  In the Properties window click on “Stop”. The Windows Search service is the active Indexing service. Stopping this service will free up resources at the cost of being able to search quickly for your files or apps. (NOTE:  While performing actions within Services, you must have administrator privileges to make changes) Alternatively, you can turn off the file indexing for specific folders and locations by going to Start > Settings > Control Panel. Then select System and Maintenance. Click the Advanced tab, and under Performance Options, uncheck Index Now. Adjust Paging File The next item we will look at is the system paging file. This is often called Virtual Memory. This is space on your drive, usually on the C: Drive, where data can be stored that was not able to fit on the RAM of your machine. Usually, windows automatically manages this for you but sometimes you do have to take matters into your own hands. If you do not feel comfortable with changing the paging file, I recommend reading more about it and making your best judgement. To Adjust the Windows Paging File 1:  Click on File Explorer, which is the folder icon, on your task bar at the bottom of the screen.   2:  While in File Explorer, Right click on “This PC” and select “Properties”. 3:  In the System Window, Click on Advanced Settings. 4:  In System Properties, Click Settings under Visual Performance. 5:  At the top of the Performance Options window, click the Advanced Tab and click Change under Virtual Memory. 6:  In this window, you will need to know how much RAM you have in your computer.  Below is the recommended setting for a computer with 8GB of RAM.  To figure out how much Virtual Memory you will need, Multiply the amount of Ram you have by 1024.  Then Multiply that with 1.5 and 4.  They will both be the minimum and Maximum amount of Virtual Memory you will want. Here is how I figured the Initial Size and Maximum Size. I have 8GB of RAM 1GB of RAM is 1024 You would want at least 1.5 times the amount of Virtual Memory for your Initial Memory and 4 times that for your Maximum. 8GB Multiplied by 1024 would be 8194 8194 Multiplied by 1.5 would be 12280 8194 Multiplied by 4 would be 32768 I hope this Article helps to speed up your PC.  Please keep a look out for future articles where I will telling you how to set up Ready Boost and a couple of other ways you can potentially speed up your computer. Feeling intimidated by these steps? We also perform Computer Maintenance & PC Repair

Speed Up Your PC With These 4 Tips Read More »

Ransomware-Attack-Prevention

5 Tips for Avoiding Ransomware

What is Ransomware? Ransomware is a piece of malicious software that infects a computer or device and encrypts the data making it inaccessible to the user. A ransom is then demanded to regain access to the victim’s data. A time limit to pay the ransom is often imposed (usually 24-48 hours) or you risk losing access to the encrypted data forever. If a backup is unavailable or the backups were encrypted too, the victim is faced with paying the ransom to recover personal files. Payment must be paid in Bitcoin and the ransom cost can be anywhere from a few hundred dollars to thousands of dollars. Once the ransom is paid, the attacker will send a private key that will allow you to decrypt the data. Tips for Avoiding Ransomware Back up your data – This won’t prevent you from being infected with ransomware, but this is one of the most important things you can do in the fight against ransomware. Regularly backup your computer and data to an external hard drive and disconnect it from the computer. This would be considered an offline backup. Even better, backup your computer off-site with a cloud backup service so that even if you suffer a ransomware attack, you can easily restore all your data and not have to worry about paying a ransom. Keep your software updated – Make sure to regularly update your operating system and the software installed on it. Ransomware attacks can take advantage of known bugs and vulnerabilities to attack and infect devices. Watch for suspicious emails and links – Be careful clicking on any links or attachments that are emailed to you. The biggest vector for ransomware infections are emails. Even if you know the sender, be mindful the their email could be compromised and a hacker is using it to infect others. If you weren’t expecting a file or link or the wording in the email seems off, it doesn’t hurt to double check with the sender. Use a anti-spam or email security service that can help block emails before they reach your inbox. Use antivirus software – Use a reputable antivirus software and keep it updated. There are some great free antivirus softwares out there along with paid ones. If you go with a paid solution, don’t let the subscription lapse so that you stop getting security updates. DNS filtering – Using a DNS filter like OpenDNS or Cisco Umbrella can help block malicious websites, content, and ransomware. By using a large database of blacklisted sites, the filter will check against the database when resolving a DNS query and then prevent the content from loading if it is blacklisted. Dealing with a Ransomware Attack If you are dealing with a ransomware attack now, here are some tips to handle it going forward. Isolate the infected machines – Try to prevent the infection from spreading any further by isolating all infected machines. Turn off the machines and disconnect them from the network by unplugging the Ethernet cable and disabling Wi-Fi, Bluetooth, and any other networking capabilities. Speed is of the essence and the longer a machine is turned on and connected to the network, the longer it has do encrypt your files and spread to other machines. Identify the type of infection – Try to identify the type of ransomware that is being used in the attack. It can help you understand how it spreads, the types of files it encrypts and possibly how it can be removed without paying a ransom to the attacker. Change login credentials – Ransomware can spread rapidly by gathering IP addresses and credentials. If the attacker manages to compromise administrative credentials they can move laterally around networks, encrypt files and wipe out backups in the process. To ensure your system is secured and to prevent attackers from thwarting your recovery efforts, you should immediately change all admin and user credentials. Assess the damages – To determine which devices have been infected, check for recently encrypted files with strange file extension names and look for reports of odd file names or users having trouble opening files. You should try to create a comprehensive list of all affected systems and data, including network storage devices, cloud storage, external hard drive storage (including USB thumb drives), laptops, etc. Notify the authorities – Once the ransomware has been contained, you will want to report the attack to the authorities. The FBI urges ransomware victims to report ransomware incidents regardless of the outcome. Victim reporting provides law enforcement with a greater understanding of the threat, provides justification for ransomware investigations, and contributes relevant information to ongoing ransomware cases. Evaluate recovery options – Ideally, you will have backups you can restore from. The quickest and easiest way to recover from a ransomware attack is to restore your systems from a clean backup. Alternatively, you may be able to remove the malware otherwise you will need to wipe all infected systems and reinstall. Performing a complete wipe of all storage devices and reinstalling everything from scratch will ensure that no remnants of the malware linger. If you need assistance dealing with a ransomware attack, Pennyrile Technologies can help! Contact us for a free consult today!

5 Tips for Avoiding Ransomware Read More »

Cybersecurity Importance

How Much do SMBs Really Spend on Cybersecurity?

Cybersecurity. If your business is just getting started, or if you’re considering expanding, it’s important to think about what you can do to ensure that your data – and your client or customer data – remains secure. Below, you can learn more about how much SMBs really spend on cybersecurity. This can help you make better choices for your own business’s needs. SMBs and the Cybersecurity Risk Many small to medium business owners make the mistake of believing that because their companies are not as large as some of their competitors’, they are simply not at risk for cyber threats. This couldn’t be further from the truth. Numerous reports show that about half of all cyber attacks aimed at business are aimed at small business and 68% of all small businesses experienced a cyber attack in the last 12 months. Because of this, every business needs to budget for cyber security. Viruses, phishing scams, and ransomware are all very real threats regardless of your company’s size, age, or revenue. How Much Do SMBs Really Spend on Cybersecurity? For most companies, cyber security budgeting is part of IT budgeting; managed IT service providers often offer security in the form of antivirus programs and even email security as part of their packages. On average, SMBs spend 5% to 20% of their total IT spend on cybersecurity. This means that if your company spends $5000 a month on IT, you should expect to spend $250 to $1000 on cybersecurity alone. Whether you should spend 5% or 20% depends on a wide variety of factors, too. These include: Business Size – A company with two employees would need to spend less on cyber security than one with 2000 employees. Antivirus and anti-malware software, for example, is typically priced by the user, and more users command a higher price. Industry – Your industry can also play an important role in your budgeting. If you collect, manage, and share sensitive financial information, then you are a bigger cyber crime target than a company that collects very little information. Requests from Customers or Stakeholders – Finally, if your stakeholders or your customers have a desire for better protections, it is worth your time and money to explore these. How Much does a Data Breach Cost an SMB? Like many SMB owners, you may feel that $250 to $1000 per month is a lot of money to spend on cybersecurity. However, rather than viewing it as an additional expense, it’s better to see it as an insurance policy against a data breach, loss of productivity, or infrastructure. IBM’s 2019 Cost of a Data Breach Report shows that, on average, data breaches cost companies $3.92 million. Small business breaches can cost an average of $120,000 to $1.4 million – and many don’t survive unfortunately. A data breach can not only drain your bank account, but it can also close your business. If you still view cybersecurity measures as a luxury rather than a necessity, now is the time to reconsider. No matter how small your business might be, no matter what industry it’s in, and no matter how careful you and your employees might be, if you collect, manage, or share customers’ information, you can be a target. Need Help with Cybersecurity? If your business needs help with cybersecurity, call or contact Pennyrile Technologies today. We can secure your network infrastructure and devices, protect against spam and phishing attacks, train employees, monitor the dark web for leaked or stolen information and more. You can also learn more about our cybersecurity services here. Don’t wait until you’ve already had a breach before considering cybersecurity for your business!

How Much do SMBs Really Spend on Cybersecurity? Read More »

Security Cameras

License Plate Recognition Cameras

License Plate Capture Cameras, License Plate Recognition, LPR Camera What are license plate recognition cameras? License plate recognition, sometimes shortened to LPR, is a feature on some cameras that allow them to detect, read, and store video of a car’s license plate. They are used primarily for traffic monitoring in parking lots, gated security entrances, drive-throughs, parking garages, and toll roads and allow the camera to capture a license plate number which is then stored in a database. They are usually mounted on street poles, streetlights, highway overpasses, or affixed to a building’s structure. Planning your LPR Camera Installation One of the first things to consider when installing a license plate camera is where it will be mounted. LPR cameras are designed to focus on a single lane of traffic with the sole purpose of recording license plates. Because of their design, they are not good at capturing wide-angles or larger areas. We recommend having additional cameras that will be used to capture details such as passengers, make, model, and color of a vehicle. With that in mind, we recommend installing the camera in a location facing a choke point or area where cars and vehicles are forced to move through. The camera will need to be facing the rear or front of vehicles so they have a clear view of the license plates. We recommend installing the camera somewhere between 6-18 feet from the ground and no more than a 30 degree angle between the camera and the license plate you are trying to read. If the camera is not mounted properly, it will have issues providing a clear view of the plate and could prevent you from capturing the license plate. For that reason, cameras facing directly head-on to oncoming and outgoing vehicles will have the best chance at capturing license plates. Lighting should also be taken into consideration when planning the install. Well lit areas may have lower hardware requirements than lower lit areas. A good LPR camera however, will be able deal with low-light areas using infrared. License Plate Camera Hardware Recommendations IP Rating – Any LPR camera you purchase should be rated at least IP65. This means the camera will offer complete protection from dust and can withstand at least low pressure bursts of water. A higher second digit rating will provide even better water protection. For instance, IP67 will provide temporary protection against a camera fully immersed in water for 30 minutes, basically making it weatherproof. Resolution – A resolution of at least 2MP will work for most installations. A higher megapixel count will give larger and clearer images if needed. Lens – A motorized lens will allow you to control the focus and zoom of the camera without directly handling the camera. This makes it easier to adjust the field of view (FoV) and focus of the camera when trying to get the optimal view. SD Card – We recommend using an NVR instead of an SD to store images and data, but they can still be used as a backup in case of an NVR failure. Warranty – Look for cameras with at least a 3 year hardware warranty. Misc – There are many more hardware options like shutter speed, wide dynamic range, and video compression standard, but will vary depending on your needs. For instance, vehicles traveling at 5 MPH vs 60 MPH will have different exposure and shutter needs. We recommend talking with an license plate recognition camera installer to see what your specific needs are. License Plate Camera Installer If you are looking to install an LPR camera, specialized camera, or security cameras in general, call us at (931) 771-1149 to go over your needs and schedule a site survey for a quote. We routinely install cameras for big box stores and retail, restaurants, warehouses, hotels, and manufacturers in Western Kentucky & Tennessee.

License Plate Recognition Cameras Read More »

Guide to Speed Up Windows 10

4 Quick Tips To Speed Up Your PC

For most people regular maintenance on their PC is far from their mind. So we’ve put together 4 quick tips that can help speed up your Windows 10 PC. We hope to followup with some additional tips in the future including some more advanced guides. Change Computer Settings to Best Performance You can change the visual effects of your computer so it doesn’t have to spend as much resources on rendering and animating windows. To do this: 1. Go to File Explorer – Click the folder on your task bar at the bottom of your desktop. You can also type in “File Explorer” in the search menu. 2. Right click on This PC on the left side of the window. 3. On the upper left side of the screen, left click on Advanced System Settings. 4. In the popup window check to make sure the Advanced Tab is selected and click the Settings button under Performance. 5. Choose between the Options listed under the Visual Effects Tab.  You can Adjust for best appearance, Adjust for best performance, or Customize the changes yourself by selecting what you want to disable in the box below the Custom bullet. If you have an older or slower PC, we recommend choosing Adjust for best performance. Disable Startup Programs You might have issues when you first turn on your computer.  You sit and type in your login information and it takes forever for you to be able to do anything on your desktop. You might have more than a couple of programs that are starting up that you don’t necessarily need right away. The more programs that run at startup, the longer it will take for your PC to fully boot. To check this: 1. On your keyboard, press the Ctrl+Alt+Del keys – this will bring up a menu. 2. Click on Task Manager. 3. At the top of the window you will see Tabs.  Click on the one that says Startup. 4. After you have clicked on startup, you will see a list of programs that begin to run when your computer starts.  These can be disabled by selecting them and clicking the Disable button on the bottom of the screen. Try disabling items that have Medium to High impact. Note: If you make a mistake you can always click the button again to enable the program again. Run Disk Cleanup When you are done with clearing up the startup programs, you can try running disk cleanup next. Having a full hard drive could cause your computer to work harder to locate programs and files.  Let us clear out a little space so you can ease the burden on you computer and recover some disk space. 1. Click on the Start Menu, scroll down and select and click Windows Administrative Tools, then click on Disk Cleanup. 2. If you have more than one drive, you may be prompted to choose which one to cleanup. Choose the C: drive if prompted. You will then be prompted with a box where you can select what types of files you would like to delete. Click on all options except for Downloads, unless you are OK with Disk Cleanup deleting all files in your Downloads folder. Clicking on any of the options will also give you a brief description of the contents. When you are satisfied with your selections, you can click OK at the bottom of the Dialog Box and you will get a prompt that will ask if you are sure you want to delete the files. When you are ready you then click on Delete Files. 3. (Optional) If you would like to recover even more space, you can click on the Clean up system files button at the bottom of the Disk Cleanup box and you will get another box with more options including Windows Update Cleanup, Windows Upgrade Log Files, and more.   Remove Adware & Bloatware Adware and bloatware aren’t always bad. In fact, they can actually help you by offering free content like news, weather reports, and other helpful information. However, these applications also tend to slow down your machine, and you may have trouble removing them. Also, when installing a program, a software vendor may sneak in bloatware or adware which can cause the computer to slow down or cause problems with the operating system. If this happens, then you should consider using a program that can clean up your system. Here are some tips that will help you identify what’s causing the slowdown. First, look at the startup process. You’ll notice that your operating system loads a lot of different programs automatically. For example, Windows starts with the browser, but it also launches the mail client, the calculator, and the clock. You need to make sure that you don’t load any unnecessary software. To do this, you should go into the Control Panel, select Add/Remove Programs, then click on “Uninstall a Program.” If your PC is slowed because of unwanted software or bloatware, and the normal Add\Remove programs method isn’t helping, then it may be time to use a third-party software. Malwarebytes can be a useful tool in finding and removing such software. It’s free for personal use too! You can download Malwarebytes here. 1. Proceed to download and install Malwarebytes. 2. When prompted to Buy Now, Activate License, or Maybe Later, choose Maybe Later and then Get Started. If you want the premium version of Malwarebytes, you can choose to Buy Now if you prefer. The primary difference between the Premium and Non-Premium version is the Premium can run automatic updates, scans and removals for you. The free version requires you to start a scan manually. You will also be given a free 14-Day trial of the software if this is the first time you are installing it. 3. Click Scan on the Malwarebytes home screen. 4. Depending on the speed of your PC, the scan can take anywhere from a few minutes to a few hours.

4 Quick Tips To Speed Up Your PC Read More »

Backup and Disaster Recovery

How Disaster Recovery as a Service Provides Peace of Mind for Small Businesses

If you sit down and think about all the things that might cause your business harm, data loss should be at the very top of that list. Very few businesses in today’s day and age still operate on a pen-and-paper model and have instead shifted into the digital realm. Though this affords a great deal of convenience, things like cyber crime, natural disasters, and even hardware failure can mean the end of the line for your company. Disaster recovery as a service can change this. The Three Biggest Disasters Facing Small Business When it comes to unexpected data loss that could potentially close your business forever, there are three ways it could happen: Natural Disasters: The NOAA, or US National Oceanic and Atmospheric Administration, reports that there have been 10 or more natural disasters causing $1 billion or more in damage every year for the last five years. They also say these disasters are becoming more and more frequent. Hardware Failure: Servers and computers – much like cars and home appliances – can fail, and when they do, it’s like the data inside never even existed. Though it may be possible to recover some data, other data may be lost forever. Cybercrime: Small businesses are targeted by cyber criminals just as frequently as large enterprises by things like spam, phishing, and even ransomware, among others. Cyber crime can completely wipe out your data and leave your company dead in the water. Disaster Recovery vs. Backup Many small businesses currently pay for what is known as BaaS, or Backup as a Service. This essentially means that the companies’ data is backed up regularly and stored in a separate location. If a natural disaster, hardware failure, or cyber crime should occur, the data is not lost forever. This is incredibly beneficial, but it often provides business owners with a false sense of security. There’s no provisioning for network or computer needs with BaaS, which means that even though the data is safe, it cannot be accessed remotely, and this creates a significant amount of downtime. DRaaS, or Disaster Recovery as a Service, solves this issue. It does include provisioning for network and computer needs. To better understand this, imagine that your company’s headquarters – including the onsite server – burned to the ground. Your BaaS provider has your servers and data saved and backed up on a server elsewhere, but it’s just a backup, so until you put a new server into place, your data and infrastructure is effectively useless. A DRaaS provider, on the other hand, allows your business to stay up and running with very little downtime (if any at all) thanks to offsite data redundancy. For many small businesses who are still trying to build a reputation and make a name for themselves, several days or even hours of downtime can be devastating. It is important for small business owners to maintain their online presence through thick and thin, even in the midst of a natural disaster. This is exactly what disaster recovery as a service was designed to do; it provides small business owners with unprecedented peace of mind by ensuring things continue to run with minimal downtime – even in the midst of a true disaster.

How Disaster Recovery as a Service Provides Peace of Mind for Small Businesses Read More »

QuickBooks Expiring

QuickBooks Desktop 2017 Expiring May 31

If you are still running QuickBooks 2017, you may have recently noticed an alert within QuickBooks or received an email stating that the 2017 version will be discontinued on May 31, 2020. Intuit regularly discontinues any products older than three years and this typically happens in late May of each year. This year, it applies to the following versions of QuickBooks: QuickBooks Desktop Pro 2017 QuickBooks Desktop Premier 2017 QuickBooks Enterprise Solutions 17 QuickBooks Premier Accountant Edition 2017 What does QuickBooks expiring mean for me? With the 2017 version expiring, your access to QuickBooks payroll services, technical support, online banking, online backup, and any other services will stop working after May 31, 2020. This also means you will no longer receive critical security updates and patches starting June 1, 2020. If you receive any security updates before this date, we recommend installing them as soon as possible. Please note, if you don’t use any of the add-on services in QuickBooks Desktop 2017, your product will still continue to work. Is it time to upgrade QuickBooks? In order to prevent problems associated with the service discontinuations and lack of security updates, you should consider either upgrading to the latest version of QuickBooks Desktop or migrating from QuickBooks Desktop to QuickBooks Online. With QuickBooks Online, you will always have the latest updates to QuickBooks, but it can lack some of the features of the Desktop version. At the time of writing, QuickBooks 2020 is the most recent Desktop version. How to upgrade QuickBooks? After you have made the decision to upgrade QuickBooks, you will need to purchase a new license. We recommend purchasing it directly from Intuit, a QuickBooks ProAdvisor, or another trusted vendor. Once you have purchased the new license, you should receive a license key and product number. These will be necessary to install QuickBooks, so be sure to hold onto them! We highly recommend you keep a copy in a safe place or document them in case the software needs to be reinstalled at some point. If you purchased a physical copy of the software, you should receive a DVD with the installer on it. If you purchased a digital copy, you will probably need to download the QuickBooks desktop software. You can also use the previous link to download the QuickBooks installer if you have lost your physical copy or need to download an older version. Once you have the installer ready, we recommend making one last backup of your company file before proceeding. After the backup, proceed to install the software and enter your license key and product number. Express setup is usually fine for upgrading QuickBooks or usage on a single computer. More advanced setups or multi-users will probably require a custom or network install. Once QuickBooks has finished installing you will need to activate your copy of QuickBooks. This typically involves signing in with your Intuit ID to activate the product. If you don’t already have an Intuit ID, you will have the option to create one and tie it to your installed copy. After you have activated QuickBooks, you will then be ready to open your company file. QuickBooks will proceed to make one last backup of the company file and then perform an upgrade of the company file itself to make it compatible with the version you have installed. You can also check to see if there are any updates available by going to the Help Menu and selecting Update QuickBooks Desktop. QuickBooks Upgrade Assistance & Backup If you need any assistance with upgrading your copy of QuickBooks, please reach out to us and we will be happy to assist. We also handle new installations, off-site backups for QuickBooks Desktop, QuickBooks Cloud Hosting, patching, and optimization of existing QuickBooks servers and setups.  

QuickBooks Desktop 2017 Expiring May 31 Read More »

working-from-home

5 Awesome Benefits of Working Remotely that Everyone Needs to Consider

Whether you’re an employer who’s concerned that your employees might lack motivation or you’re an employee who looks forward to seeing your coworkers every day, you might be feeling some anxiety regarding working from home. Below are five awesome benefits of working remotely that everyone should consider. #1 – There’s No Commute Many people out there don’t really mind getting up and going to work in the morning (or at night). It’s the commute that they dread. Some people drive an hour or more to and from work each way, and it can be difficult staying motivated or entertained. Employees who can work remotely can avoid that commute, and it may even help them feel more productive. If they drive an hour each way, they’ve just gained two more hours a day, and that’s an extra 10 hours per five-day workweek. Remote work has a positive environmental impact by reducing commuting and its associated carbon emissions. With fewer people commuting to and from the office, remote work contributes to lower traffic congestion and air pollution. It aligns with sustainability goals and supports a greener approach to work. #2 – There’s a Bigger Applicant Pool When it comes to the best and brightest talent in all the hottest industries, workplace flexibility is a key consideration. They want the ability to work from home, and if a company doesn’t provide it, they’re likely to keep searching for a job that does. By opening your mind to the possibility of hiring remote workers – or at least giving people the option – you’ll have access to a much larger talent pool. Better still, you can hire someone across the country since commute time no longer has an effect on who you choose to fill positions. Remote work allows companies to tap into a global talent pool, as geographical barriers are no longer a constraint. Organizations can hire the best talent regardless of their location, increasing diversity and bringing in unique perspectives and expertise. #3 – People Can Work the Way They Want When people have the option to work the way they choose, whether that’s in their pajamas with a laptop on the couch or dressed in their best business casual in the home office, they are more autonomous, and that makes them more productive. Employees who work with deadlines rather than being forced to be at a desk from nine until five tend to be happier overall, too. Remote work provides the flexibility to choose where you work, allowing individuals to create a workspace that suits their preferences and needs. Whether it’s working from home, a co-working space, a coffee shop, or even while traveling, remote work offers the freedom to work from anywhere with an internet connection. #4 – Working Remotely Costs Less There’s no getting around it: providing employees with office space is incredibly expensive. In fact, for many companies, office space is one of their largest expenses. When you choose to allow employees to work remotely, you can save money on the office space, utilities, and the overhead costs associated with maintaining a physical office. Remote workers can save on commuting expenses, office attire, and dining out for lunch. Additionally, remote work may open up opportunities for individuals to live in more affordable areas, reducing housing expenses. As an employee, you’re saving money on your commute, your business wardrobe, and even lunches in the office. It’s truly a win-win situation for everyone, even if it is only temporary or only part-time. #5 – You Can Use New Technologies With everything from managed IT service to VoIP and cloud-based apps as a service, there’s truly a technology to make everything possible. When you give your employees all the right tools, they can and will succeed. It’s up to employers to choose the right technologies and the right protections. As an employee, you may find yourself learning how to use new technologies that can benefit not only your work life and your resume, but your personal life, as well. Working from home can be quite the transition, and it can cause anxiety among workers and employers alike. Nevertheless, more people are working from home now than ever before in history, and many of them are succeeding, too. Consider the five benefits above and it will be much easier to decide whether working remotely is the right choice for you. Working Remotely Challenges While there are many amazing benefits of working remotely, there are also some challenges to consider. One challenge can be the social isolation from other employees. Remote work can be isolating, especially for individuals who are used to working in a social office environment. The lack of face-to-face interaction and casual conversations with colleagues can lead to feelings of loneliness and decreased motivation. Additionally, remote workers may miss out on networking opportunities and building strong professional relationships. Another challenge for some employees are the social distractions at home. Some employees who have never worked remotely may have issues with time management or a lack of routine in their day-to-day as it can be difficult adjusting to working remotely for some. Some individuals thrive in a structured office environment, where routines and social interactions provide motivation. Remote work requires self-discipline and self-motivation, as individuals are responsible for managing their own time and maintaining focus. Without a clear routine or external accountability, productivity can be adversely affected. Finally some employers have cited issues with collaboration and team building when employees work from home. Remote workers also may face challenges in terms of career growth and visibility within their organizations. They may miss out on informal opportunities for professional development or networking that are more common in traditional office settings. Remote workers need to proactively seek out opportunities to showcase their skills and contributions to ensure career advancement. Working Remotely Conclusions We have gone over some of the benefits and challenges of working remotely today. Remote work often involves relying on virtual communication tools and platforms. This can sometimes lead to

5 Awesome Benefits of Working Remotely that Everyone Needs to Consider Read More »

How to Clean A Keyboard

Best Way to Clean & Sanitize Laptops & Computer Equipment

Laptops, desktops, mice, keyboards, and computer equipment are often overlooked when it comes to cleaning duties, but they can harbor viruses and bacteria on their surfaces – especially when it comes to touchscreens and keyboards. Below is some helpful advice for sanitizing your equipment to protect your health. CDC Guidelines for Cleaning The US Centers for Disease Control and Prevention (CDC) has offered up several helpful tips for cleaning and disinfecting facilities during the COVID-19 outbreak of 2020. First, the CDC recommends cleaning surfaces with soap and water, especially frequently-touched surfaces like doorknobs, desks, faucets, keyboards, and others. Then, surfaces should be disinfected with an EPA-registered disinfectant or a diluted bleach solution. How to Clean Electronics It can be difficult to clean and sanitize electronics with soap and water or with household disinfectants, but the CDC offers a few other guidelines specific to computers, keyboards, and other equipment. First and foremost, they recommend using a wipeable cover over keyboards and other electronics that you touch frequently. You can find keyboard covers for most laptops and major keyboards online. They also suggest looking up the manufacturer’s instructions for disinfecting computers and laptops. Before attempting to clean any computer or equipment, be sure that is unplugged and completely powered down. Never spray anything directly onto the computer or equipment, even when it is advised that you utilize a spray. Always spray onto a clean, soft cloth and remember that microfiber works best – especially for monitors, which are prone to smearing and scratching. Finding Manufacturer’s Instructions For the most part, the guidelines for cleaning computers is the same regardless of the brand or model, but a few of the major manufacturers have created webpages for this purpose. Hewlett-Packard (HP) – https://support.hp.com/us-en/document/c00292159 Dell Technologies – https://www.dell.com/support/article/en-us/sln308919/guidance-for-keeping-your-dell-technologies-equipment-clean?lang=en Samsung – https://www.samsung.com/us/support/answer/ANS00083426/ Disinfecting Other Computer Equipment For the most part, cleaning your other computer equipment is as simple as wiping it down with a cloth dipped into a disinfecting solution or a disinfecting wipe. Things like the outer case on your computer (laptop or desktop), your servers, the legs/stand on your monitor, your mouse, and your desk area can all harbor viruses and bacteria and should be cleaned frequently. Cleaning Your Smartphone or Tablet Your smartphone and tablet will also require frequent cleaning and disinfecting. Refer to your manufacturer’s instructions to discover which sprays are best for use with your particular device. Make sure you turn your phone or tablet completely off, then slightly dampen a microfiber cloth with the spray (never spray anything directly on the device) and wipe the entire surface of the device – the back, the front, and each side. Then, let the device sit for the time indicated on the spray and wipe any remaining product away with a damp microfiber cloth. Whether you’re working from home or as an “essential” employee, it is imperative that you heed the advice of the CDC and your electronic devices’ manufacturers to keep them clean and sanitized. After all, our hands spend a lot of time with them, which makes them the perfect breeding ground. Killing germs on your computers, screens, keyboards, and other equipment frequently will go a long way toward keeping you healthy and safe. Don’t Forget to Clean Inside Your Computer Finally, don’t forget to clean the inside of your laptop and desktop periodically. The accumulation of dust, crust, and crumbs can clog fans, vents, and heat sinks. This can result in overheating, poor performance, and more wear and tear on your computer. We recommend powering off your computer and taking it outside. Use a can of compressed or canned air with short bursts to push all of the dust out the vents. When cleaning the fans, be sure to keep them from spinning while using the compressed air. If you cause the fans to spin at a high rate with the compressed air, it could potentially cause static damage to the fan or other components. If you are feeling intimidated by the whole process, Pennyrile Technologies can assist with cleaning your PC too!

Best Way to Clean & Sanitize Laptops & Computer Equipment Read More »

Data Protection & Disaster Recovery From Bad Weather

Springtime Severe Weather is Just Around the Corner – Is Your Data Protected?

Kentucky and Tennessee are not technically in the swath of the nation dubbed “Tornado Alley,” but neither state is immune to springtime severe weather. Things like straight-line winds, devastating lightning strikes, and even flooding along the Ohio River can have a detrimental effect on your business’s network, including its server and the associated data. To ensure your company’s success, you should ensure you’re protected with a backup and disaster recovery solution.   What is a Backup and Why Do You Need One? A backup is simply a copy of your company’s data. It may include files, customer data, software, system states of servers and more. It’s highly recommended your backup is stored in another location which should always be separate from your main server. In the event severe weather affects your place of business and takes out your server, that backup ensures that your company’s data is not lost forever. Since 70% of companies that experience data loss, quickly go out of business afterward, backups are vitally important. They can make the difference between a failed business and one that succeeds, even in the face of a disaster.  How Does Disaster Recovery Work? Disaster recovery is the process by which information that was destroyed during severe weather, a fire, a flood, cyber-crime, user error, or even hardware failure is recovered. The entire goal of disaster recovery should include re-obtaining as much of the lost information as possible as quickly as possible. After all, the more quickly you can get your data back and get your site online, the lesser the impact of the event that caused the data loss, and the more likely your business will come through unscathed.  Disaster recovery works by restoring data from an off-site location not directly affected by the disaster. That’s why backups to a remote location are so important. If you backup data to the same location as your primary network and servers, then they could be damaged by the disaster as well rendering them useless. Tips for Successful Backup & Disaster Recovery Now that you understand the importance of backup and disaster recovery, here are a few tips to help you feel certain that you are protected before this year’s severe weather season:  Evaluate risks and vital systems – Evaluate potential risks and disasters that could affect your business. Make plans for how to deal with them. Also identify vital systems and data that need to be restored after a disaster. Create a new backup every 15 to 60 minutes – The more frequently you create backups of your company data, the more data you will be able to recover in the event of a disaster.  Test your backups – So your backing your data up and that’s great! Now be sure to actually test the backups on a regular basis. Make sure the data can be restored and in a time frame acceptable to your disaster recovery plan. Utilize the cloud – The cloud exists to protect your data by ensuring it is in more than one location. When you choose to upload your backups to the cloud, they will be stored at a server that is at a different location. If your location is impacted by severe weather and you lose your server, your data still exists, and all you have to do is download it.  Hire a professional – One of the best ways to be absolutely certain that your data is always 100% protected in the event of a disaster is to hire a professional team to help you automate your backups and uploads. Better still, in the event that you are impacted by a disaster, you will have a support team to help you get back on your feet.  As you can see, a backup and data recovery solution is critical to the overall success of your business. Without it, should disaster strike, you may lose your company’s data forever. For the best possible results, make sure you choose an expert company that can help your small or medium business weather the storm. Need assistance creating a disaster recovery plan and implementing it? Pennyrile Technologies can help and make sure you’re protected against all forms of disasters from mother nature, to cyber-criminals and malicious employees. Contact us today for a free consultation and see how we can help protect your business.

Springtime Severe Weather is Just Around the Corner – Is Your Data Protected? Read More »