Guides

Windows 11 Tips & Tricks

Windows 11 Tips & Tricks

When purchasing a new computer, you may notice that the display differs from the usual Windows 10 interface. Windows 11 has now become the standard operating system shipped with new PCs and laptops and some users may find the transition a hassle. Here are some of our Windows 11 tips and tricks to make the shift from Windows 10 to Windows 11 smoother as you learn how to navigate the new operating system. Windows 11 Tip # 1 – File Explorer Managing your files in File Explorer can be confusing, especially with the changes made in Windows 11. The familiar buttons for copying, pasting, renaming, sharing, and deleting files are now located at the top of the menu with more modern icons. However, labels for these action buttons have been removed, which can leave some users wondering how to perform these actions. While pressing Control + C and Control + V still works, some users prefer a visual menu. To access this, simply right-click and inspect the top of the menu where all the required icons are located. Alternatively, to access the old menu, you can right click as before and select “Show more options” and this will display the old Windows 10 right-click menu. Windows 11 Tip # 2 – Snap Layouts Windows 11 introduced several new features to improve productivity, and one of these is Snap Layouts. With Snap Layouts, it’s now easier to organize your windows than trying to resize them yourself. Snap Layouts help users organize and arrange multiple windows on the fly.  When you bring a window to the top of your screen, snap options will appear, allowing you to choose a snap layout that suits your needs. This is especially helpful when you have multiple applications open. One example is if you wanted to watch a how-to video on one half of the screen while practicing your skills on the other half!   Windows 11 Tip # 3 – Quick Settings A new quick settings menu was added in Windows 11 which features a home for your most used settings and personalization. Upon opening the Quick Settings menu, you can turn Wi-Fi on, connect to Bluetooth devices, and change your desktop background. With these features, never again will you wonder how to turn on dark mode or change your PC’s name. The Quick Settings menu has been redesigned to give you more control over your computer. Previously located within the notifications in Windows 10, this new action center has a dedicated tab on your taskbar. By selecting the action center, you can easily access the volume, brightness, and accessibility features along with viewing battery percentage and health. This empowers you to take control of your device with easy-to-access Quick Settings at any moment. Windows 11 Tip # 4 – Snip and Video Windows 11 refined the snipping tool and now allows for taking videos of your screen without additional apps. By pressing the combination of keys: Windows Key + shift + ‘s’ you gain access to the screenshot and screen record functions. You can also select which parts of the screen you would want to capture using the drop-down menu. Windows 11 Tip # 5 – Windows Security Like Windows 10, Windows 11 comes with a built-in antivirus that helps to keep you safe while using your computer. Windows security has been improved by requiring TPM 2.0 and Secure Boot as base components to ensure that even if there is an intrusion, damage will be minimized. By mandating Secure Boot and TPM, Windows 11 enhances the overall security posture of devices running the operating system. It helps in protecting against various types of attacks, including malware infections, rootkits, and unauthorized access. Secure Boot ensures that only digitally signed and trusted software components are allowed to run during the boot process. This prevents malware or unauthorized software from executing before the operating system loads, thus protecting the system from various types of attacks that target the boot process. TPM is a hardware-based security feature that provides a secure environment for storing cryptographic keys, credentials, and other sensitive data. It offers protection against various attacks, including unauthorized access and tampering. Windows 11 Tip # 6 – Teams Chat A simplified version of Microsoft Teams is implemented into the taskbar and allows you to communicate with anyone through SMS integration if you are signed in with a Microsoft account. It also allows you to video chat and call with other PC users also using a Microsoft account. Teams chat is particularly useful for remote workers, friends, and family members who want to connect face-to-face from different locations. Conversating without your phone can be a lifesaver when you don’t have access to it or if you are trying to maximize productivity. Windows 11 Tip # 7 – Widgets Stay up to date on the latest, using Windows 11’s Widgets. Designed to provide users with quick access to personalized information, such as news, weather, calendar events, and more. To access this information-rich area, click the Widgets button on the taskbar, or by using the shortcut keys from your keyboard, Windows Key + “w”. The Widgets menu will pop up, displaying various options for quick information. To add a widget to the menu, click on the plus sign next to ‘Widgets’ and select which widgets you want to show. Additionally, you can find other settings such as pin/unpinning, removing, and resizing widgets by clicking the three dots in the top right corner of any widget and remove it. Windows 11 Tip # 8 – Focus Sessions By activating a focus session on Windows 11, you can lock into whatever you are working on by reducing distractions and using built-in integrations with Spotify and Microsoft To-Do. Focus Sessions are designed to help users break down their work into focused intervals, typically referred to as “pomodoros.” The idea is to work on a specific task with full concentration for a set period, followed by a short break. These features are accessed

Windows 11 Tips & Tricks Read More »

Windows Bitlocker Drive Encryption

What is BitLocker and why should you use it?

If you’re in doubt about whether you should enable BitLocker or wondering if it’s safe to use this encryption tool, we have all your answers! Nowadays, it’s easy for hackers to steal sensitive information such as personal records, financial information, passwords, and more. This is why it’s essential that you encrypt your sensitive data to protect against physical theft of your data. Bitlocker is a disk encryption tool included with Microsoft Windows operating systems. It provides a full disk encryption feature to help protect data on the operating system drive and other fixed data drives. While this isn’t the only tool you should use to help protect and keep your data safe, BitLocker can help you keep your data safe from potential threats and unauthorized access. Let’s look at it in more detail! What is BitLocker? Simply put, BitLocker is a Windows tool designed to protect your data from unauthorized access. It encrypts the entire contents of a disk, including the operating system, system files, and user data. By using symmetric encryption with a pre-boot authentication mechanism, BitLocker is able to secure the system before the operating system is even loaded. It plays a crucial role in enhancing the security of data on Windows devices. If your computer or hard drive is stolen, the data cannot be read without the proper decryption key. BitLocker is a built-in feature compatible with most Windows Pro, Enterprise, and Education Operating Systems starting with Windows Vista. This includes Windows 7 and Windows Vista Ultimate and Enterprise versions, Windows 8 and 8.1 Pro and Enterprise, Windows 10 and 11 Pro, and Windows 2008 and later server operating systems. How does BitLocker work? BitLocker works by securing the boot process on Windows computers. After it’s enabled and it encrypts the hard drive, users must provide an authentication method (such as a password, PIN, or USB key) during the pre-boot phase to unlock and access the encrypted drive. Without this, the data is rendered inaccessible. It also helps ensure the integrity of the boot process by verifying that the early boot components have not been tampered with by using a TPM chip. So what is a TPM chip? It’s a security chip used to enhance the security of your computer. This chip comes pre-installed and functions along with Bitlocker by running a check on your device’s software and hardware to protect your data and ensure your device is safe from unauthorized access while offline. It generates, stores, and manages cryptographic keys within the chip. These keys are used for various security functions, such as encryption, decryption, and digital signatures. Most computers built in the last few years will have one installed, especially computers built for the business market. If you don’t know whether your PC has a TPM chip, BitLocker can help check on your PC to see if it supports this encryption tool. Even if your device doesn’t have a TPM chip, you can still use BitLocker. However, in this process, you’ll need a bootable USB drive to start your PC. Another option is to use an operating system volume password instead of TPM. Reasons why you should use BitLocker The main reason behind the introduction of BitLocker was to help save and protect your sensitive information and records by addressing the threats of data theft or exposure from lost, stolen, or inappropriately decommissioned devices. If that isn’t a good enough reason for you, here are 5 other reasons to implement BitLocker. It can extend it’s encryption capabilities to external drives through BitLocker To Go. This feature allows users to encrypt USB drives and other removable storage devices, securing data even when it’s transferred between devices. It helps organizations meet security and compliance requirements. Many regulatory standards and frameworks, such as GDPR and HIPAA, recommend or require the use of encryption to protect sensitive data. BitLocker is integrated into the Windows operating system, making it relatively easy to use. Once configured, it operates transparently in the background without requiring constant user intervention. This helps make it cost-efficient and easy to use. It provides easy recovery options in case a user forgets their passwords or encounters issues during the boot process. Recovery keys can be generated during the encryption process, offering a way to regain access to the system in case of issues. BitLocker can be integrated with Microsoft Active Directory for centralized management. This helps simplify the key management and recovery processes, especially in enterprise environments. It can also be integrated with other third-party tools. Some encryption tools can slow down the system of your PC during encryption, but BitLocker typically has a minimal impact on the performance of your PC. Are there any disadvantages to using BitLocker? While BitLocker provides many advantages for users, including robust disk encryption for Windows-based systems, there are some potential disadvantages or considerations to be aware of: Availability. The disk encryption feature is not available in all editions of Windows. It is primarily found in Windows Pro, Enterprise, and Education editions. Users of Windows Home editions will not have access to BitLocker without upgrading to a higher edition OS. Non-Windows compatibility. BitLocker encrypted drives may pose compatibility issues when accessed from non-Windows systems. If you need to share encrypted drives with users on different operating systems, compatibility will probably be an issue for you. There is potential for key loss. If a user forgets their BitLocker password or PIN, and if recovery keys are lost or not properly managed, there is always a risk of permanently losing access to the encrypted data. Hardware requirements. BitLocker relies on specific hardware features, such as the Trusted Platform Module (TPM), to provide certain security functions. Systems without a TPM or that do not meet its hardware requirements will have some limited functionality. Ready to implement BitLocker for your business? In the dynamic world of business, safeguarding your sensitive data is not just a priority; it’s a necessity. By introducing BitLocker encryption, you’ll help shield your business against cyber threats. By leveraging encryption,

What is BitLocker and why should you use it? Read More »

Installing Security Cameras Guide

A Comprehensive Guide on Installing Security Cameras

In today’s rapidly advancing world, security cameras have become an essential component of any comprehensive security system. Whether you want to protect your home, office, or any other property, installing security cameras can provide you with a sense of safety and peace of mind. In this article, we will guide you through the process of installing security cameras, covering everything from planning and camera selection to installation and optimization. Planning out and installing security cameras involves several key steps to ensure effective coverage and functionality. Here’s a comprehensive guide with 6 steps: 1. Assess Your Security Needs Before diving into the installation process, it’s crucial to assess your security requirements. Consider the areas you want to monitor, potential blind spots, and the type of camera features you desire. Evaluate whether you need indoor or outdoor cameras, night vision capabilities, motion detection, PTZ, or remote access options. Understanding your security needs will help you make informed decisions during the installation process. 2. Determine Camera Placement Careful placement of security cameras plays a pivotal role in maximizing their effectiveness. Identify the key areas you want to monitor, such as entry points, driveways, and valuable assets. Ensure the cameras have an unobstructed view and cover as much area as possible. Consider the camera’s field of view, and if necessary, use multiple cameras to eliminate blind spots. Additionally, make sure the cameras are mounted at a height that is out of reach that will make them difficult to tamper with. We recommend then drawing a layout of your property and mark the locations where you need cameras. Ensure that the cameras cover all critical areas without leaving blind spots. Consider camera range and angle. 3. Select the Right Cameras With an array of security cameras available in the market, selecting the right one can be overwhelming. Consider factors such as resolution, camera type (bullet, dome, or PTZ), connectivity (wired or wireless), and storage options. High-definition (HD) cameras provide clearer images and are recommended for detailed surveillance. Wireless cameras offer flexibility in terms of installation but require a reliable network connection and power source. For outdoor cameras, ensure they are weatherproof and can withstand the elements. Choose cameras with infrared or other night vision capabilities for low-light conditions. Choose cameras that align with your specific security needs and budget before you begin installing security cameras. 4. Gather the Necessary Equipment To successfully install security cameras, gather the required tools and equipment. Commonly needed items include: Cameras: Based on your assessment, purchase the selected cameras. Cables and Connectors: Ensure you have the appropriate cables (coaxial or Ethernet) and connectors for a secure and reliable connection. Power Supply: Depending on the camera type, you may need individual power adapters or a centralized power supply with a distribution box like a PoE switch. Mounting Hardware: Select the appropriate mounts, brackets, junction boxes, and screws to securely install the cameras. 5. Install and Configure the Cameras Now that you have all the necessary equipment, it’s time to install and configure the security cameras: Mount the Cameras: Follow the manufacturer’s instructions to securely mount the cameras in the predetermined locations. Ensure they are angled correctly to capture the desired field of view. Connect the Cables: Connect the camera cables to the designated ports on the cameras and run them to a central location where the recording equipment will be placed. Establish Power Supply: Provide power to the cameras by connecting them to the power source. Ensure all power connections are secure and protected from weather conditions. Configure the Cameras: Access the camera’s configuration settings through a computer or mobile device and adjust parameters such as date and time, resolution, motion detection, and recording preferences. Set up any additional features or notifications according to your preferences. 6. Test and Optimize After installation, it’s vital to test and optimize your security camera system: Check Camera Feeds: Verify that each camera is transmitting video feed to the recording equipment or monitoring software. Adjust Camera Angles: Fine-tune the camera angles if necessary to eliminate blind spots or improve coverage. Test Recording and Playback: Trigger motion events or manually record footage to ensure the cameras are recording properly. Test playback functionality to confirm that recorded footage is accessible. Consider Lighting Conditions: Evaluate the lighting conditions during the day and night to determine if additional lighting sources are required to improve image quality. Installing Security Cameras Conclusion Installing security cameras is an effective way to enhance the safety and security of your property. By following the steps outlined in this guide, you can ensure proper camera placement, select suitable equipment, and successfully install and configure your security camera system. Remember to periodically review and maintain your cameras to ensure they continue to operate optimally and provide you with the desired level of security. If you need assistance or are looking for a professional for installing security cameras, contact Pennyrile Technologies for a free quote. As professional security camera installers, we possess the necessary expertise and experience to handle all aspects of the installation process. You can also rest assured that you will be provided with high-quality security cameras and equipment and be confident in the reliability and performance of your security camera system.

A Comprehensive Guide on Installing Security Cameras Read More »

Ubiquiti Installers & Support

Ubiquiti Installer & Support

A poor Wi-Fi connection and slow network has become a problem for many businesses. If your business is experiencing this or you are looking to upgrade or setup a new network, a Ubiquiti UniFi network can help solve the problem. Nowadays, our networks tend to depend a lot on Wi-Fi connections and gigabit connections. It is more convenient as it provides faster speed than most mobile networks. But when it is slow, it can get on your nerves. But with a Ubiquiti network, this won’t be a problem. This is why your home or business needs Ubiquiti UniFi hardware installed. And our Ubiquiti installers are here to offer you our services and support. What Is Ubiquiti? Ubiquiti Inc is an American tech company based in New York. It was founded in 2003 in San Jose, California. Ubiquiti is a specialist in wireless connections and networking products for multiple different environments, from home to small and medium business and enterprise. Whether it is your home or office building, you will find Ubiquiti services in many of them. Their initial product was the mini PCI radio card and other wireless products. They have since expanded to many other product lines. Some of them include EdgeMax, UniFi, airMAX, etc. We will discuss this further below. What is UniFi? UniFi is a product line from Ubiquiti that focuses on networking tools. They have several product ranges and models, including switches, wireless access points, routers, security cameras, etc. UniFi is one of the most common systems found in many homes and offices. This is because they are reasonably priced. It offers a middle ground where people can still afford good quality networking tools from a renowned manufacturer. UniFi wireless networks have a pretty long range. From an apartment building to a thousand-seater stadium, their range is quite vast. Moreover, you can choose the devices that you need to build your UniFi connection. It doesn’t mean you can have a connection only when you are utilizing Unifi products. For instance, UniFi’s access points are enough to get you up and running. Of course, having all the pieces will benefit your greatly. But you can make do with a starter pack. UniFi OS Consoles We cannot talk about UniFi without including UniFi OS consoles. It is the software that runs the operating system for all UniFi devices. Examples of UniFi OS consoles are the Cloud Keys, Dream Machine Pro, etc. UniFi consoles are helpful if you don’t want to use a self-hosted controller. These consoles include the Cloud Keys. We can still find the first generation of Cloud Keys on the market. But for better accessibility, our Ubiquiti installers recommend the second generation. The first generation of Cloud Keys faced several issues, like database corruption if there was a sudden power outage. This issue is resolved in the second-generation Cloud Keys. They have an inbuilt battery that shuts down smoothly when there is no power. It also has a hard drive with storage of 1 TB, expandable up to 5 TB. We can integrate this with UniFi Protect. This feature is helpful for cameras. Other consoles include: Dream Machine Dream Machine Pro Dream Machine SE Dream Router We always recommend using UniFi OS consoles to run your Unifi hardware. They are designed to optimize memory and CPU usage. At the same time, these consoles are fully secure and help tighten your privacy. UniFi Switches UniFi switches come in layer 2 and layer 3 models with gigabit ethernet and 10 gigabit ethernet models too. There is also PoE availability that allow us to build scalable networks. They perform really well and are pretty cheap and sturdily built. You can get UniFi switches with different Ethernet ports. This includes 8, 16, 24, and 48 PoE and non PoE ports. You can also use a UniFi controller software to configure the PoE at a passive 24V. UniFi switches are an update to the much older EdgeSwitches. However, UniFi switches lack some of the advanced features we find on EdgeSwitches. UniFi switches also operate at layer 2 and some at layer 3. This means the layer 2 switches cannot be used as a router, but they can handle VLANs effectively. The first generation of UniFi switches are quite old. But they are still robust layer 2 switches. There are plenty of models, which include 8-port models to the US-48-500W, which can be rack mounted by a Ubiquiti installer. Here are some of the more popular first-generation models: Switch 8 Switch 16 PoE Switch 24 Switch 24 PoE Switch 48 Switch 48 PoE Switch XG 16 Other than that, they have the second-generation models. These models are far better than the first-generation models. They are more compact and lightweight with lower fan noise. The second-generation models also come with a touchscreen display. This screen displays information like the network, stats, etc. And they lack a console port, so you have to manage them over Ethernet in-band. Some of the more popular second-generation models include: Switch Flex Mini Switch Flex Switch Lite 8 PoE Switch Lite 16 PoE Switch 48 PoE Switch Industrial Furthermore, these models begin with the name “USW.” For instance, the USW-16-PoE. The first generation begins with the name “US,” like the US-8. UniFi Routers There are two different generations of UniFi Routers and a few models to choose from. UniFi networks are modular. So you can add and remove hardware accordingly. A UniFi router is not entirely necessary to run an UniFi network. But having a full UniFi stack has many benefits. UniFi routers offer standard routing, a Virtual Private Network, etc. But more complicated networking setups can be a problem for a UniFi router. Here is a list of UniFi routers. UniFi Security Gateway UniFi Security Gateway XG 8 UniFi Dream Router UniFi Dream Machine UniFi Dream Wall Cloud Key Gen 2 UniFi Next-Generation Gateway Pro UniFi Wireless Access Points There are several access points to choose from. UniFi offers up to 6 models. But the essential

Ubiquiti Installer & Support Read More »

Microsoft 365 Security

Best Practices For Microsoft 365 Security

Microsoft 365 security practices are often overlooked when managing an organization. In this guide we will look over and recommend several Microsoft security recommendations and how to implement them. What is Microsoft 365? Microsoft 365 is a productivity suite for home, business, and enterprise users. It comes highly recommended by countless businesses and is s also one of the most popular software suites in the world, with an active user base of more than 340 million users. Microsoft 365 has evolved over the years and securing your organization’s tenant can be daunting. Here are some Microsoft 365 security practices we recommend implementing. Use Multi-factor Authentication Protocols The most critical security factor for any software or application is the password. Despite its importance, most people tend to choose weak passwords that are easy to remember. While this is quite convenient for you, the user, it is very inconvenient for your computer’s security. Easy passwords can be uncovered by hackers or cyber criminals who are always trying to steal your data. What’s more, some people even use the same password over and over again for multiple devices, software, and websites. In that case, a hacker would simply have to figure out the universal password to gain access to all your devices. Seeing how easy it is to steal and misuse passwords, it would be a good idea to set up an extra layer of security for all your sign-ins. Luckily for you, you can use multi-factor authentication or MFA to increase your Microsoft 365 security. How Does Multi-factor Authentication Work? If you’re a Windows user, chances are you use the same password for everything. That’s because most of us don’t want to create and memorize multiple passwords when we can just use one. And most importantly, most people don’t even know how to add security layers without simply using a secondary password. MFA adds an extra step during sign-up procedures, requiring you to use your primary password and then a secondary verification method. Rather than using an additional password that you can memorize, the process takes a more instinctive path. There are two ways to go about this. Typically, MFA sends a verification code to your smartphone via SMS, which you must confirm by typing it into your computer. This code changes with each sign-in and never repeats itself, no matter how many tries. You On the other hand, you can also use a more secure method and verify using an authenticator app on your phone from Microsoft, Google, or Duo to name a few. How Does Multi-factor Authentication Help? Multi-factor authentication is extremely beneficial to those users who have a habit of keeping weak passwords. That’s because the process makes you use both your password and an extra verification method. Suppose a hacker has gained access to your password and is now planning to use it to log into all your accounts. In this scenario, the hacker might get through the first sign-up stage but won’t get through the second. That’s because the MFA protocol automatically sends a sign-up prompt to your phone that the hacker will not have access to. Since the hacker doesn’t have access to your phone or your fingerprints, he won’t be able to get far. So, by removing dependency on a single test, the MFA protocol boosts security and ensures that only you can sign into your accounts. Safeguard Your Admin Account The very first account you create for Microsoft 365 automatically becomes your global administrator account. Being a global admin means having full control of all other accounts and settings. As you can imagine, this is a juicy opportunity for hackers to attack because securing this one account will give them access to everything. It is in your best interest to always safeguard the global admin account. Create Other Accounts The simplest measure to overcome this issue is to create different accounts for your use. After all, you don’t need to use the admin account every day. You can easily do your work via a secondary account instead and only use the admin account to change your settings. Alternatively, you could also create a separate admin account that can function on an emergency basis. If something happens to your original admin account, for example, it got hacked, you can always switch to the secondary admin account. Don’t forget to use MFA on your admin accounts either! Use Preset Security Policies Your Microsoft 365 subscription will typically come with security policies that the software itself has preset. These include useful settings for anti-malware, anti-phishing, and anti-spamg protection. Although 365 has a set of default built-in preferences, we recommend switching it over to something more particular. It’s important to know that security presets are not the same as default settings. They are both different from each other and cannot be used as the same thing. Microsoft 365 typically lets you set a default setting first and then any added preset security policy you desire. What’s Included In Preset Microsoft 365 Security Policies? You can choose several types of preset security policies, each with its own distinct features. The type of profile you select will determine how strict or lenient your security is. Choosing policies will make 365 focus on the theme or subject matter and change its settings to suit the requirements. Some policies include anti-phishing, anti-spam, impersonation protection, spoof settings, etc. Finally, policy settings will determine if you use the setting for a single user, group, or multiple domains. Standard Protection – This is the protection level recommended for most businesses and enterprises. This profile is most suitable for anti-malware, anti-phishing, and other similar settings. Strict Protection – This profile includes everything you can find in standard protection and some added benefits. It uses the same base settings as the previous profile but adds strict measures and a more accurate authentication process. It is the perfect option for businesses that must meet tough security regulations. Most businesses use strict protection to safeguard their valued clients

Best Practices For Microsoft 365 Security Read More »

Keep Your Computers Updated

The Importance of Windows 10 Updates & Automatic Maintenance

When thinking about keeping your computer secure from threats like Viruses, Malware, or Ransomware, the first thing you might think of is a good anti-virus software. While anti-virus is important, one of the most important steps in protecting your Windows 10 PC is keeping Windows and and the software on your PC patched and up-to-date. These updates help protect your computer from falling victim to exploits hackers can use to access your system. Why It is Important to Update Windows 10 Patches, updates, and hot-fixes are essential for keeping your computer and network secure. The threat of hackers obtaining your personal information has been ever more apparent lately and you need to be vigilant. Most Microsoft updates or hot-fixes are centered around security and/or threat vulnerability. A hacker only has to penetrate your computer’s defenses once, and they can get any information they want. Malware can enter a system by an exploit, whether by a user or program. The exploit can then be used to gain access to your computer or information. Patches, updates, and hot-fixes are sent out to fix those exploits or make them more challenging to access. Not all of the patches are to fix exploits however. Patches can be released that add new features, increase stability, or make the software faster for example. Some computer manufacturers provide programs to help assist users with updates with minimal intervention. Some good examples of programs that assist with updating your system and checking overall computer health are Dell SupportAssist, HP Assistant, and Lenovo System Update. These are just a few examples of the many manufacturer’s programs that can assist you with updates. How to Update Windows 10 To manually update Windows 10, you can follow the instructions below: Go to search on the taskbar and type in check for updates, then click on the first result. On the next screen, click on Check for Updates. When it is done scanning, it will automatically start installing Windows updates. Below the check for updates button, you might see View Optional Updates. Optional updates is where you can get feature updates, monthly non-security updates (also called preview updates), and driver updates. Alternatively, you can click on Start  > Settings > Update & Security  > Windows Update > Check for updates. How to Uninstall a Windows 10 Update With Windows Update, you don’t always have control over which updates are installed. Sometimes bad updates are released that can cause your computer or a software to act unexpectedly. The updates could cause programs to crash, lose some functionality, or cause the dreaded Blue Screen of Death. In a business or production environment, we recommended testing the updates on a small number of computers before fully deploying them. If your computer is having issues after a recent update, you can try uninstalling it as well. Thankfully, it’s pretty easy to view and uninstall recent Windows 10 updates. If a patch for windows 10 has gone bad, it may be time to remove it. To view or uninstall a recent update, follow these steps: Go to search on the taskbar and type in check for updates, then click on the first result. On the next screen, click on View Update History. Next, click on Uninstall Updates. From here you can view the name of the update, the program and version, name of the publisher, and the date the update was installed. Click on the update you wish to remove and click on Uninstall. Windows will begin uninstalling the update and you may be prompted to restart your computer once it finishes.   How to Update Drivers in Windows 10 Updating drivers has become a lot easier with Windows 10, especially compared to previous operating systems from Microsoft. Drivers can now be installed automatically through Windows Update when you check for updates. If you would like to manually install a driver though, you can follow these steps. Manually Update Device Driver In the search box on the taskbar, enter device manager, then select Device Manager. Select a category to see names of devices, then right-click (or press and hold) the one you’d like to update. Select Search automatically for updated driver software. Select Update Driver. If Windows doesn’t find a new driver, you can try looking for one on the device manufacturer’s website and follow their instructions. If you are having an issue with a connected device and would like to try reinstalling the driver, you can also follow the steps below. Manually Reinstall a Device Driver In the search box on the taskbar, enter device manager, then select Device Manager. Right-click (or press and hold) the name of the device, and select Uninstall. Restart your PC. Windows will attempt to reinstall the driver. Keeping Your Business’s Computers Updated Manually updating your computers can take a lot of time and effort. Pennyrile Technologies can help automate this process and ensure your computers are always kept updated with the latest patches and fixes. We know updates can happen at inconvenient moments. You can’t always control when your computer decides to update itself and sometimes it happens when you’re in the middle of something. Right when you need your computer most, it can be busy installing an update and you won’t be able to use it. With our IT Support Services, we proactively manage and maintain your technology environment so all your devices are always health and updated consistently and reliably. Save yourself time and effort so you can run your business not having to  worry about keeping your computers up-to-date.

The Importance of Windows 10 Updates & Automatic Maintenance Read More »

Web Hosting

5 Easy Steps for Choosing a Good Web Host

Looking to start a new website or on the search for a new web hosting provider? You probably aren’t alone! It’s estimated there are 1.2 billion websites on the Internet as of January, 2021. Trying to search for the best web hosting provider will return hundreds of choices from the search engines and trying to determine what information is valuable or actually helpful can be daunting. With that in mind, we’ve put together a list of five steps for choosing the best web hosting provider for your business or upcoming project. We hope this will make your search just a little bit easier! Table of Contents Determine Your Needs Defining A Budget Support Needs Server Speeds Extra Features Determine Your Needs One of the first things we recommend doing is sitting down and writing a list of all your needs and a general plan for your website. Will your website only be a few pages and static (rarely updated) or will you be updating the site constantly and adding new content, or hosting lots of pictures and video? If the website is small with only a few pages then you can usually choose a web hosting plan with a small amount of storage. Typically 5GB of storage or less works for most small to medium-sized web sites. What about bandwidth? Unless you own an extremely high traffic site, then this probably won’t factor into your decision. The average website uses less than 20GB of bandwidth a month so unless you are getting 20,000 + visits a day and have lots of content on your site, a smaller plan should be fine. If you receiving that many visits a day, you should be able to log into your current host’s control panel for a breakdown of your monthly traffic. Using that information will be helpful if moving to another host. Defining A Budget For Web Hosting You probably know the old saying, “you get what you pay for”. Like many things, this is relevant to web hosting too. There are countless hosting companies out there with cheap hosting plans and minimal services. Shared hosting plans will typically start around $4.99/mo from the budget providers and go up to $24.99/mo or more if you are needing large amounts of storage and bandwidth or looking at a premium hosting. When signing up for services, also be careful to look at the fine print on renewals. Some providers may lure you in with a cheap price, but then increase your bill by 50% or more once the renewal comes! Lastly, you may be able to save money on your hosting by paying in advance for a year or more. You may want to try month-to-month at first to see if you are happy with the service they provide though. Support Needs for Web Hosting What happens when you need support from your web host? Make sure the web hosting provider you choose has good support. Many of the cheapest web hosting plans have to skimp on the services somewhere and support is usually where it’s happening. Can you call the provider and speak with a support technician in a timely manner or do you have to wait on the phone for 30 minutes to an hour or more? Some providers may only offer email-based support or chat-based support as well. What about resolution times to issues raised? If you have an issue, does it get resolved in 10-15 minutes or does it take days? Some providers may even charge extra for “premium” support where that would be considered regular support by others. Web Hosting Server Speeds Finding a web host with fast servers is important when having an online presence. It’s estimated the average user will only wait 3 seconds for a page to load before they leave a site, so choosing a host with good hardware can be very beneficial. When looking at Shared Hosting Packages, note that your website will be hosted on a server alongside other websites. Some providers may use cheaper hardware or overload their servers with too many websites to save money. Alternatively, you could look at VPS Hosting or Dedicated hosting which would grant you more dedicated resources, added security, and increased scalability. Pricing is much higher than Shared Hosting however, with VPS Hosting usually running anywhere from $20 to $100 a month. Dedicated hosting is even more expensive and typically ranges in price from $80 to as much as $500 a month. Extra Features to Look For Another thing to look for are extra features the web hosting provider offers. While some providers may include these as default in their hosting plans, others may charge extra for them which can add up rather quickly. Here are some of our favorite extra features to look for when searching for a web host provider. Free SSL Certificates – This varies a lot across providers. Some include them for free while others may charge anywhere from $5/year to more than $100/yr. If you have a website, we highly recommend installing an SSL certificate for your site. It helps secure the site for your visitors and is also a ranking factor for appearing in Google search results. Uptime Guarantee – What kind of uptime guarantee does the provider offer? An uptime guarantee of 99.9% allows for 8 hours, 45 minutes, and 56 seconds of downtime a year while a 99.99% uptime guarantee allows for only 52 minutes and 35 seconds of downtime a year. 30 Day Money-Back Guarantee – Does the provider backup their service with a 30 day money-back guarantee? If so, they are probably confident in their abilities and services they offer to their clients. Free Domain – This isn’t as common as some of the other features we look for, but it can add to additional savings. Domain renewal pricing varies wildly across registrars and hosts and usually depends on extension (.com, .net, etc.). The savings from a free domain can by anywhere from $5/yr to $20/yr or

5 Easy Steps for Choosing a Good Web Host Read More »

Cell Phone Booster Installation Guide

Cell Phone Booster Installation Guide

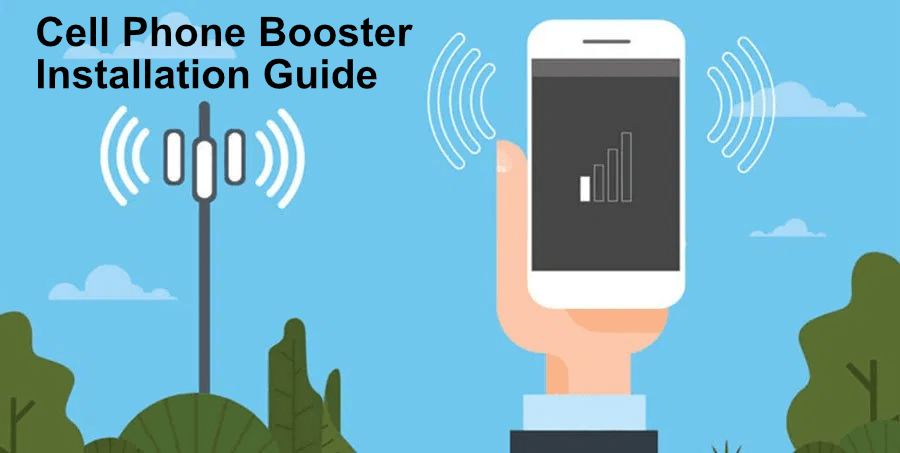
Cell phones have become a necessity in these trying times. They are our main form of communication for work, contacting family, or watching videos. Many people often do not have an excellent connection to the cell network. It is a common problem even if you have a well-known carrier as your cell provider. The issue usually involves: Not being close enough to a tower. Being in a building that blocks a lot of the cell signal. Having multiple towers around you that cause interference. Suppose you live or work in an area where it is hard to get a good signal for your phone. You might go about your daily activities just dealing with this connection issue, including dropped calls or reduced voice quality. A cell phone booster is an excellent way of fixing these connection issues. They take the existing signal and boost it while transmitting the signal out in key places so your phone can have a better connection. Before You Begin Before getting a cell phone booster, consider some of the following questions: Do I have no signal where I need my cell phone? Do I often need my cell phone to complete tasks? Do most of my cell phone interactions get interrupted because of signal loss? Do I have a better signal outside than I do inside? Is it possible that the building blocks the cell signal from reaching my phone? Is the distance to the closest cell tower possibly what causes my signal loss? Chances are, if you say yes to some or all of these questions, then you could benefit from a cell phone booster. Before you start, you must have at least 1 bar of usable signal outside or on the roof of the building you are installing the booster on. What do we mean by usable? You need to be able to place a call and use data reliably. When running a speed test, you should have decent upload and download speeds. Cell boosters bring signals inside from the outdoors. If the signal outside your building is not usable, the booster will not help. Choosing Your Indoor Cell Phone Booster Antenna When you purchase a cell booster, you will need to decide which types of antennas you will need for both inside and outside the premises. The most common types of indoor antenna are dome (omni-directional) and panel (directional) antennas. The dome antenna will broadcast the signal in all directions, while the panel antenna will broadcast in only one direction. Panel antennas will typically have a stronger signal because they broadcast in one direction. Because of their directionality they are better at penetrating internal walls and floors. They are typically mounted on walls and are good for spot locations. Dome antennas will broadcast the signal 360 degrees and may cover a larger area, but with a weaker signal due to their omni-directional broadcast. They are typically mounted on ceilings, but if you have very high ceilings (20 feet or higher) the signal may be reduced. Depending on the building and the area you are trying to increase your cell reception will determine which antenna you use. You may even wish to use a combination of the two. Choosing Your Outdoor Cell Phone Booster Antenna Much like the indoor antennas, you will need to choose an omni-directional antenna or directional antenna for your outdoor antenna. This antenna is responsible for receiving the signal outside the building and sending to your amplifier. An omni-directional antenna will receive cellular signals in a 360-degree window. They are great for accessing nearby cell towers and if you need to boost the signal of multiple different cell phone carriers. The directional antenna will only receive cellular signals from the general direction it is pointed. Their advantage is boosting signals from far off cellular towers or when you are dealing with weaker signals. Please note if you are using an omni-directional antenna, the antenna could become overburdened, especially within bustling urban areas. Because these antennas can pick up multiple cellular carriers, you may receive interference from multiple towers or have issues locking onto the signal of a specific tower causing dropped calls. A directional antenna is harder to set up, but they have an easier time locking onto a specific tower. On the down-side, they usually support 1 to 2 cellular providers and are limited by their angle of field due to their directional signal. Beginning Your Cell Phone Booster Installation After you have decided to purchase a cell phone booster, you will receive your booster, and then it is time for the install. The install will take some time and maybe a little more hands-on than you may like. You might decide to have someone install it for you. Then again, if you have the time and patience, you may want to install it yourself. Let us begin with the inventory of your equipment. When you receive your booster, you will typically be given: Cables Antenna Amplifier Grounding Cable Adapters Transmitters Installation Instructions The instructions included with the equipment should have a list of all the items that are in your installation package. This would also be an excellent time to read over the instructions and verify all parts are included. Pay close attention to the instructions on where to place the outdoor antenna. The outdoor antenna will receive the signal and send it to the amplifier. Before installing your booster, plan out where to place the inside antennas. Please pay close attention to how far apart they will be positioned and how much material is between them. If the antenna is too close, then there will be interference. There will not be as much coverage if they are too far apart either. If thick walls block the signal, the antenna range might not reach the surrounding rooms. This will also cause issues with coverage. Once you plan the layout for your inside antennas, we can begin finding the best position for your outside antenna. The process

Cell Phone Booster Installation Guide Read More »

Speed-Up-Windows-10-Part-Two

Speed Up Your PC With These 4 Tips

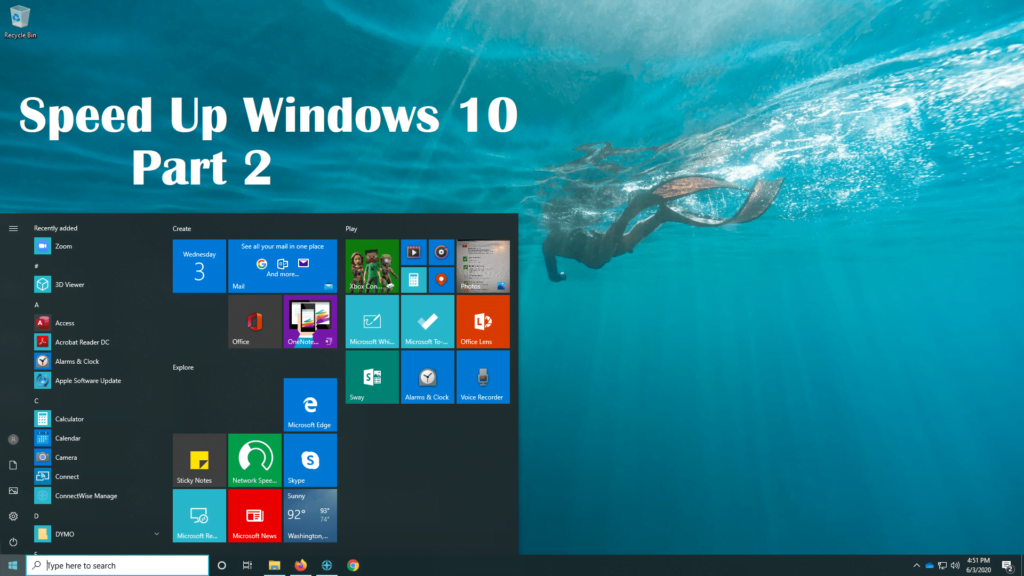
You probably don’t need us to tell you that there are a lot of things that can slow down your PC. If you’re looking to improve the overall speed of your machine, we’re here to continue some useful tips to help you along. Earlier, I began a series of quick tips to speeding up your computer.  In that article, we covered Computer Settings, Startup Programs, Disk Cleanup, and Adware & Bloatware removal. This time we are going to continue with a few more tips on increasing the performance of your computer. For those who did not read the first article but would like to, check out 4 Quick Tips To Speed Up Your PC. Defragment Your Hard Drive Lets talk about organization. Your hard drive must organize the data that is put on it.  With more data comes more responsibility.  So, to help your hard drive stay organized it is recommended that you defragment your hard drive regularly. Defragmentation involves moving all of the files on your hard disk so that the operating system can read them more quickly and efficiently. Usually this is done automatically by your operating system but sometimes it can be missed. (Note:  If you have a SSD then it is not recommended to Defragment your Drive because it could shorten its’ life.) To Defragment your hard drive 1:  Go to the Start menu. 2:  Scroll down to Windows Administrative Tools and click. 3:  Select and Click Defragment and Optimize Drives. 4:  Select the drive you would like to Defragment and Click Optimize. 5:  Wait for Defrag to complete its work. Adjust PC Power Settings After defragmenting, your computer might still be slow. This is a good opportunity to change your power settings. There are 3 types of default power settings:  Power Saver, Balanced, and High-Performance. Having your computer set to Power Saver saves on power usage but at the cost of performance, which can slow down your computer. The Balanced setting is the in between for the other two settings.  Lastly, the High-Performance setting uses more power to get the best performance. The later of the settings will eat up the power of your battery provided you are using a Laptop. To change your Power settings 1:  Go to the Start Menu 2:  Click on Windows System and Select Control Panel. 3:  In Control Panel Click on System and Security 4:  Click on Power Options. 5:  Select the High-Performance. (Note:  If you have Control Panel set to Large or Small Icons then click on Power Settings.) Turn Off File Indexing Now that you have set your power settings to your liking, lets move on to Indexing.  Indexing allows you to use the Windows 10 search function more efficiently.  It does this by indexing the files on your drives. The Indexing Service uses CPU and RAM to search for a file that you want to find.  This can slow down a computer that is already taxed on CPU and RAM usage. By turning file indexing off, it can help speed up your PC. To shut down the Windows Indexing Service 1:  Go to the Start Menu and scroll to Windows Administrative tools and click, then select and click Services. 2:  When the Services Window opens, scroll down to “Windows Search” and Right click on it and select Properties. 3:  In the Properties window click on “Stop”. The Windows Search service is the active Indexing service. Stopping this service will free up resources at the cost of being able to search quickly for your files or apps. (NOTE:  While performing actions within Services, you must have administrator privileges to make changes) Alternatively, you can turn off the file indexing for specific folders and locations by going to Start > Settings > Control Panel. Then select System and Maintenance. Click the Advanced tab, and under Performance Options, uncheck Index Now. Adjust Paging File The next item we will look at is the system paging file. This is often called Virtual Memory. This is space on your drive, usually on the C: Drive, where data can be stored that was not able to fit on the RAM of your machine. Usually, windows automatically manages this for you but sometimes you do have to take matters into your own hands. If you do not feel comfortable with changing the paging file, I recommend reading more about it and making your best judgement. To Adjust the Windows Paging File 1:  Click on File Explorer, which is the folder icon, on your task bar at the bottom of the screen.   2:  While in File Explorer, Right click on “This PC” and select “Properties”. 3:  In the System Window, Click on Advanced Settings. 4:  In System Properties, Click Settings under Visual Performance. 5:  At the top of the Performance Options window, click the Advanced Tab and click Change under Virtual Memory. 6:  In this window, you will need to know how much RAM you have in your computer.  Below is the recommended setting for a computer with 8GB of RAM.  To figure out how much Virtual Memory you will need, Multiply the amount of Ram you have by 1024.  Then Multiply that with 1.5 and 4.  They will both be the minimum and Maximum amount of Virtual Memory you will want. Here is how I figured the Initial Size and Maximum Size. I have 8GB of RAM 1GB of RAM is 1024 You would want at least 1.5 times the amount of Virtual Memory for your Initial Memory and 4 times that for your Maximum. 8GB Multiplied by 1024 would be 8194 8194 Multiplied by 1.5 would be 12280 8194 Multiplied by 4 would be 32768 I hope this Article helps to speed up your PC.  Please keep a look out for future articles where I will telling you how to set up Ready Boost and a couple of other ways you can potentially speed up your computer. Feeling intimidated by these steps? We also perform Computer Maintenance & PC Repair

Speed Up Your PC With These 4 Tips Read More »

Guide to Speed Up Windows 10

4 Quick Tips To Speed Up Your PC

For most people regular maintenance on their PC is far from their mind. So we’ve put together 4 quick tips that can help speed up your Windows 10 PC. We hope to followup with some additional tips in the future including some more advanced guides. Change Computer Settings to Best Performance You can change the visual effects of your computer so it doesn’t have to spend as much resources on rendering and animating windows. To do this: 1. Go to File Explorer – Click the folder on your task bar at the bottom of your desktop. You can also type in “File Explorer” in the search menu. 2. Right click on This PC on the left side of the window. 3. On the upper left side of the screen, left click on Advanced System Settings. 4. In the popup window check to make sure the Advanced Tab is selected and click the Settings button under Performance. 5. Choose between the Options listed under the Visual Effects Tab.  You can Adjust for best appearance, Adjust for best performance, or Customize the changes yourself by selecting what you want to disable in the box below the Custom bullet. If you have an older or slower PC, we recommend choosing Adjust for best performance. Disable Startup Programs You might have issues when you first turn on your computer.  You sit and type in your login information and it takes forever for you to be able to do anything on your desktop. You might have more than a couple of programs that are starting up that you don’t necessarily need right away. The more programs that run at startup, the longer it will take for your PC to fully boot. To check this: 1. On your keyboard, press the Ctrl+Alt+Del keys – this will bring up a menu. 2. Click on Task Manager. 3. At the top of the window you will see Tabs.  Click on the one that says Startup. 4. After you have clicked on startup, you will see a list of programs that begin to run when your computer starts.  These can be disabled by selecting them and clicking the Disable button on the bottom of the screen. Try disabling items that have Medium to High impact. Note: If you make a mistake you can always click the button again to enable the program again. Run Disk Cleanup When you are done with clearing up the startup programs, you can try running disk cleanup next. Having a full hard drive could cause your computer to work harder to locate programs and files.  Let us clear out a little space so you can ease the burden on you computer and recover some disk space. 1. Click on the Start Menu, scroll down and select and click Windows Administrative Tools, then click on Disk Cleanup. 2. If you have more than one drive, you may be prompted to choose which one to cleanup. Choose the C: drive if prompted. You will then be prompted with a box where you can select what types of files you would like to delete. Click on all options except for Downloads, unless you are OK with Disk Cleanup deleting all files in your Downloads folder. Clicking on any of the options will also give you a brief description of the contents. When you are satisfied with your selections, you can click OK at the bottom of the Dialog Box and you will get a prompt that will ask if you are sure you want to delete the files. When you are ready you then click on Delete Files. 3. (Optional) If you would like to recover even more space, you can click on the Clean up system files button at the bottom of the Disk Cleanup box and you will get another box with more options including Windows Update Cleanup, Windows Upgrade Log Files, and more.   Remove Adware & Bloatware Adware and bloatware aren’t always bad. In fact, they can actually help you by offering free content like news, weather reports, and other helpful information. However, these applications also tend to slow down your machine, and you may have trouble removing them. Also, when installing a program, a software vendor may sneak in bloatware or adware which can cause the computer to slow down or cause problems with the operating system. If this happens, then you should consider using a program that can clean up your system. Here are some tips that will help you identify what’s causing the slowdown. First, look at the startup process. You’ll notice that your operating system loads a lot of different programs automatically. For example, Windows starts with the browser, but it also launches the mail client, the calculator, and the clock. You need to make sure that you don’t load any unnecessary software. To do this, you should go into the Control Panel, select Add/Remove Programs, then click on “Uninstall a Program.” If your PC is slowed because of unwanted software or bloatware, and the normal Add\Remove programs method isn’t helping, then it may be time to use a third-party software. Malwarebytes can be a useful tool in finding and removing such software. It’s free for personal use too! You can download Malwarebytes here. 1. Proceed to download and install Malwarebytes. 2. When prompted to Buy Now, Activate License, or Maybe Later, choose Maybe Later and then Get Started. If you want the premium version of Malwarebytes, you can choose to Buy Now if you prefer. The primary difference between the Premium and Non-Premium version is the Premium can run automatic updates, scans and removals for you. The free version requires you to start a scan manually. You will also be given a free 14-Day trial of the software if this is the first time you are installing it. 3. Click Scan on the Malwarebytes home screen. 4. Depending on the speed of your PC, the scan can take anywhere from a few minutes to a few hours.

4 Quick Tips To Speed Up Your PC Read More »